
There are settings in HubSpot that often get skipped during onboarding and never get revisited. Not because they're hard, but because users don't even realize they are there.
These three are quick to set up and don't require a developer. But they unlock features that have a big impact.
1. Install the HubSpot Tracking Code
Right now, someone might be on your website—looking at your pricing page, reading your about page, comparing you to a competitor. Without the tracking code, you’ll never know.
The tracking code is a small piece of JavaScript that goes on your website — similar to how Google Analytics works. If your site is hosted on HubSpot, it's already there. If your site is on WordPress, Squarespace, or any other platform, it needs to be added.
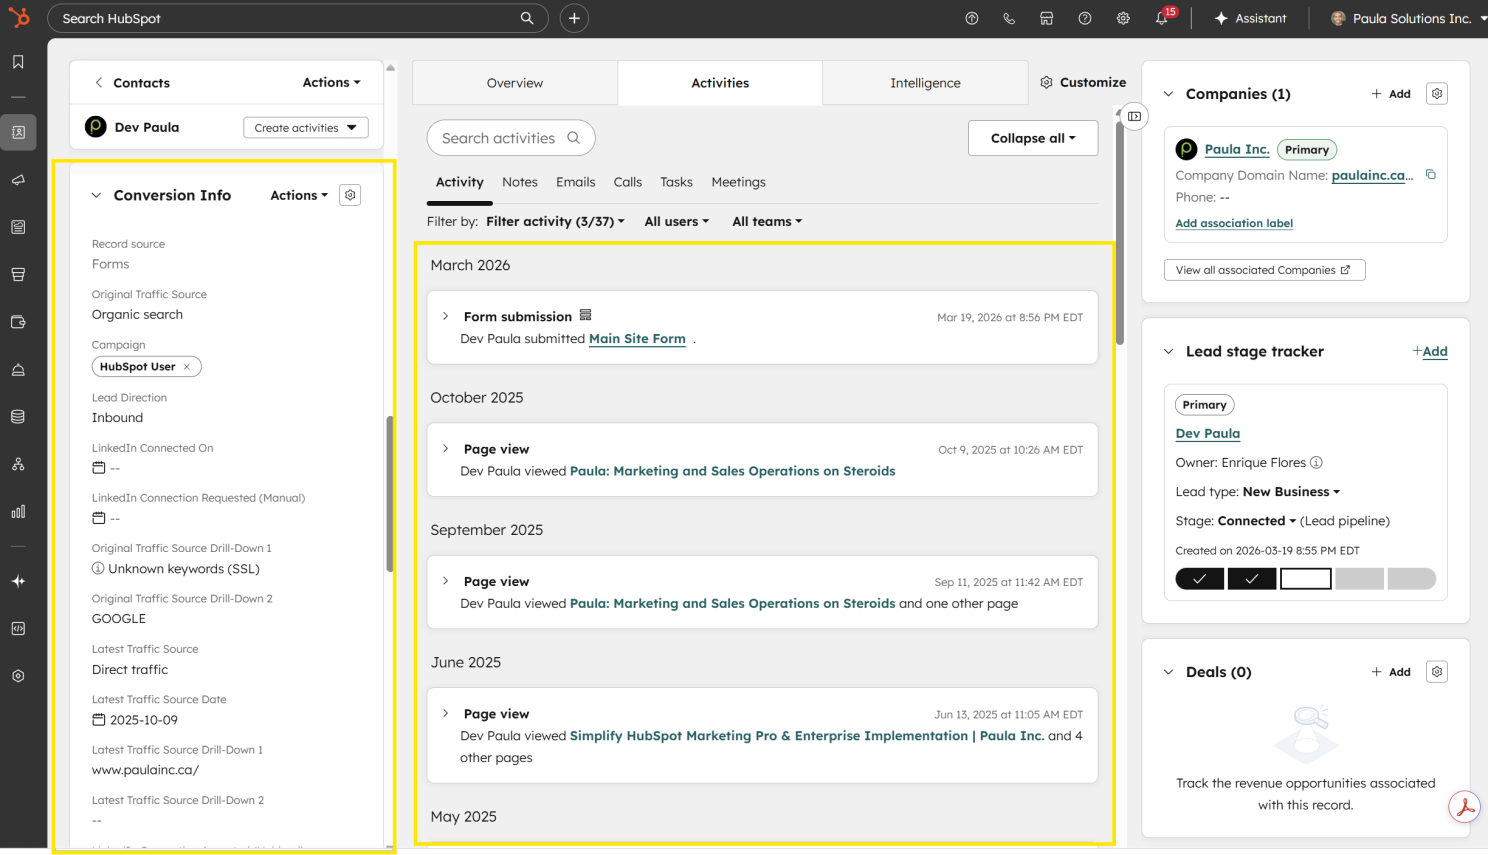
With it installed, HubSpot starts watching your website and connecting the dots. When that visitor eventually fills out a form, HubSpot ties their entire browsing history to their contact record. Your sales team can see exactly what they looked at before reaching out.
Here’s what becomes possible once the tracking code is in place:
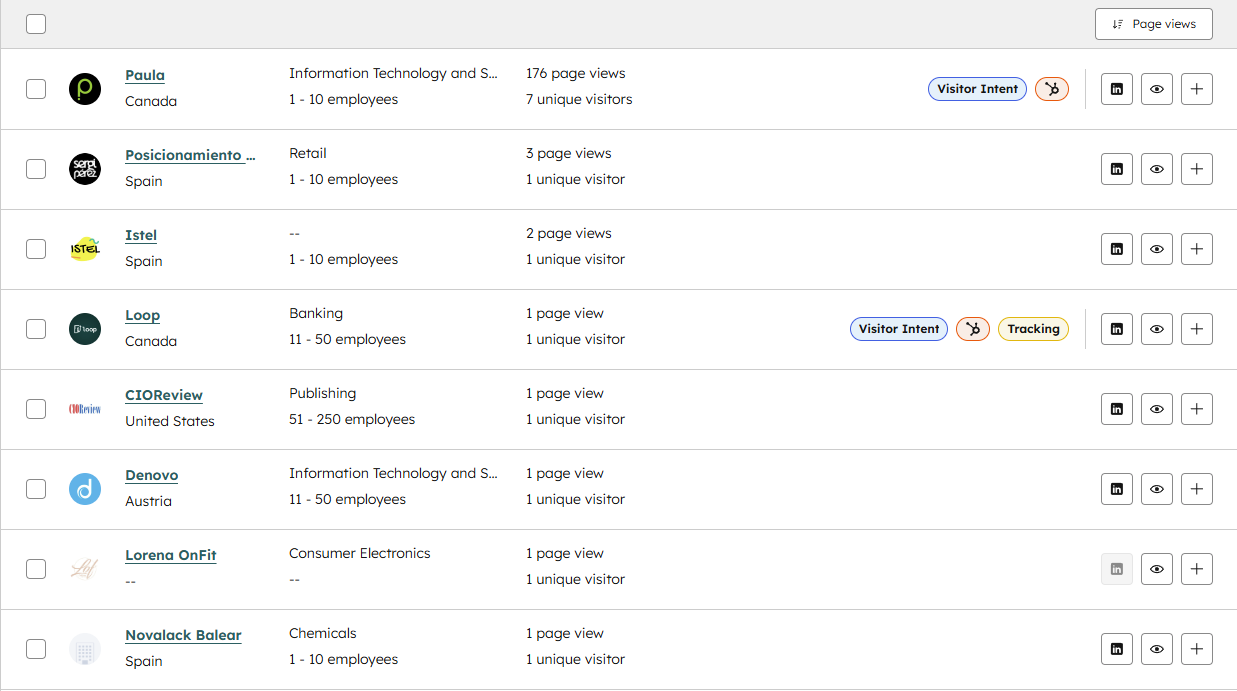
See who’s on your site
HubSpot identifies which companies are visiting—even before anyone fills out a form. If a target account is checking out your site, you’ll know.
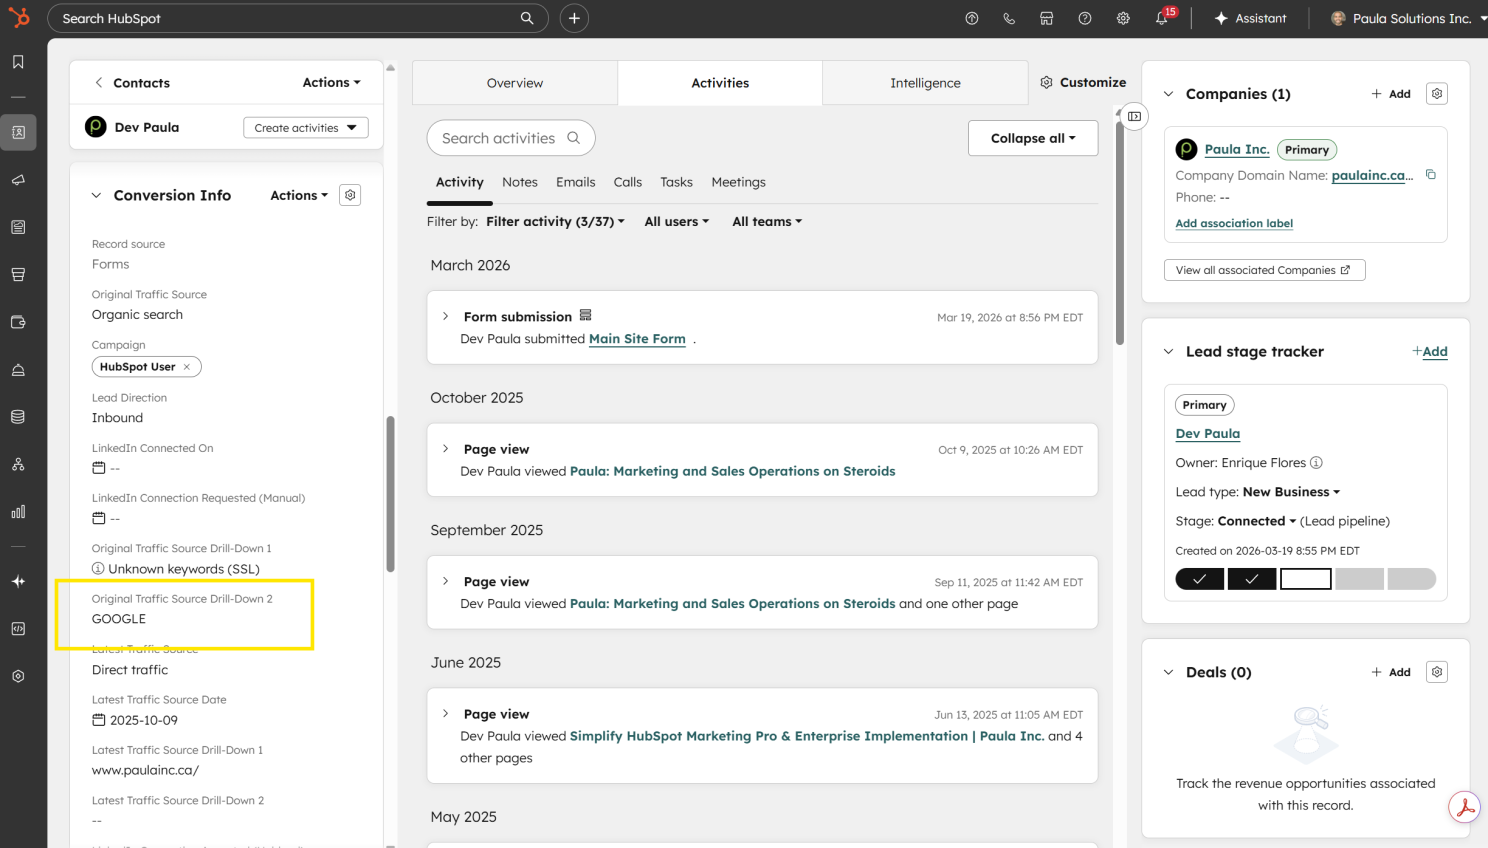
Know what brought them there
Every visit is tagged with how the person arrived—Google search, LinkedIn, an email campaign, a direct link. You can finally see which channels are actually driving traffic.
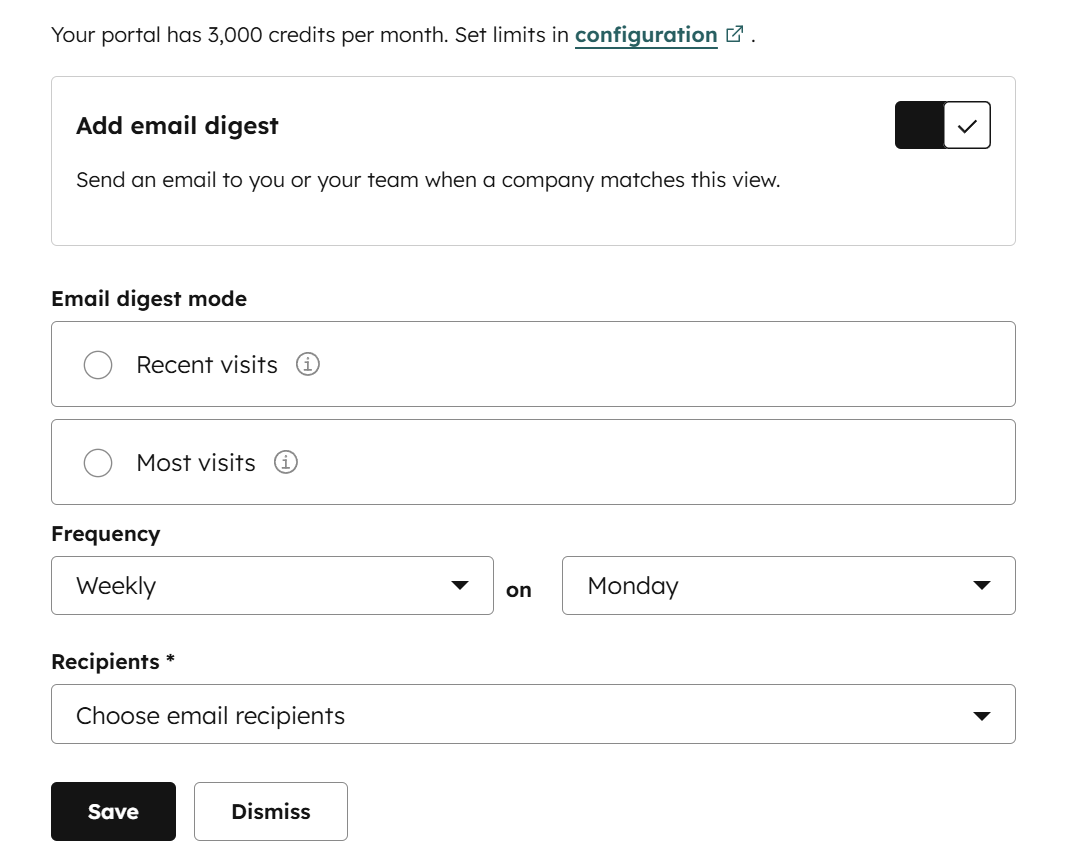
Get notified when prospects come back
When someone your sales team has been talking to returns to the site — whether it's a company you are watching or an individual you are already in contact with — HubSpot can send a real-time alert. That’s a buying signal you’d otherwise miss entirely.
What it’s costing you without it:
Without the tracking code, HubSpot’s analytics layer is effectively off. Contacts, deals, and emails still work—but you’re making decisions without the visitor data the platform is designed to give you. More importantly, you are missing important buyer intent signals.
| 🪛 Setting it up: Step 1: Go to Settings > Tracking & Analytics > Tracking Code Step 2: Copy the code (or click “Email to my web developer”) Step 3: Paste it before the closing </body> tag on every page of your site |
💡Pro Tip: If your site is on WordPress, skip the manual install. The HubSpot All-in-One Marketing plugin adds the tracking code automatically and gives you access to forms, live chat, and basic reporting inside WordPress | HubSpot WordPress Plugin
Two things people miss:
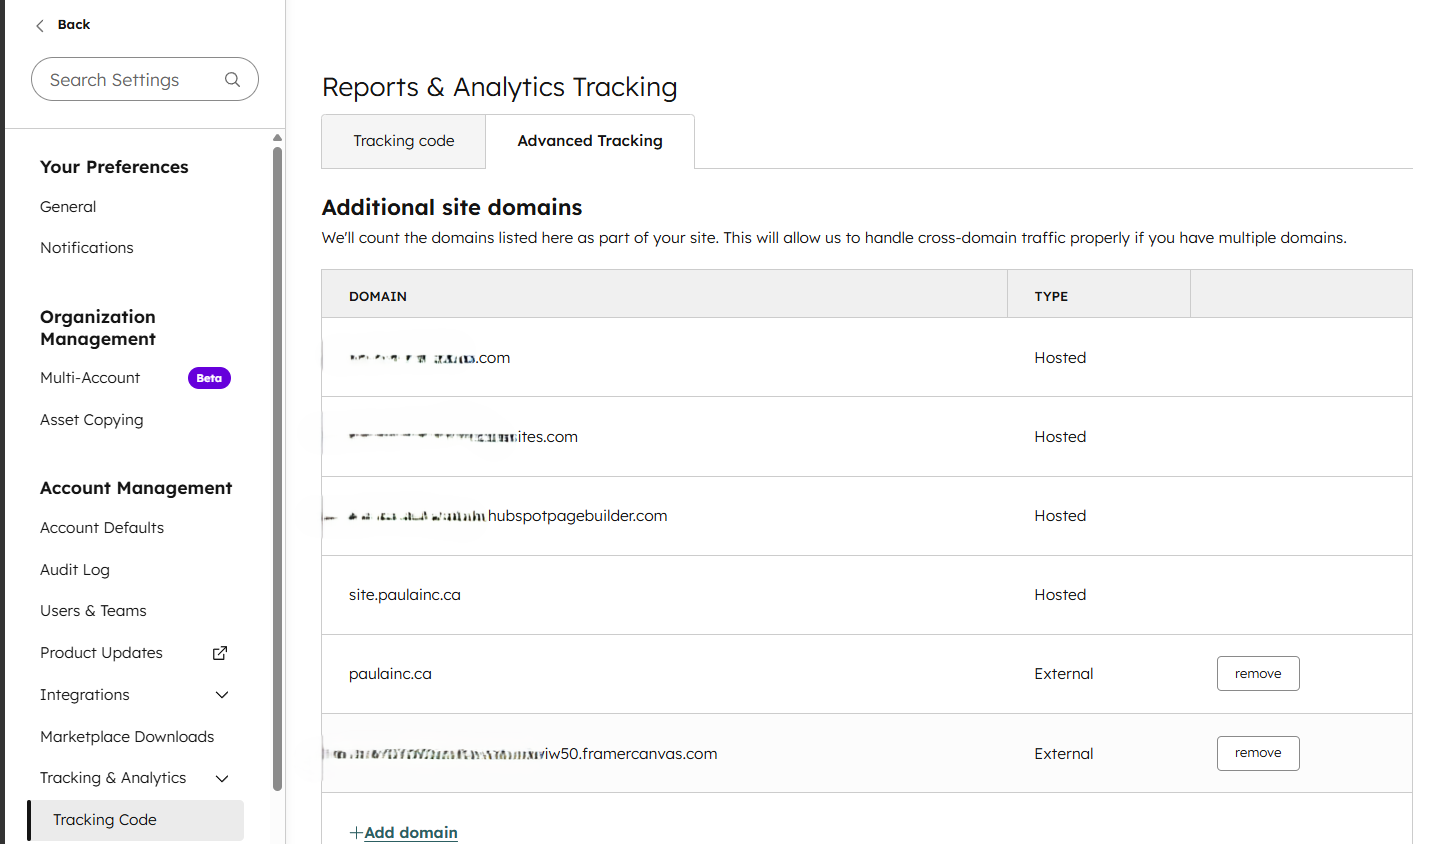
1. Add your external domains in HubSpot settings. Installing the code on your site is step one. But you also need to tell HubSpot which domains to include in your reports. Many companies use more than one — maybe your main site is on yourcompany(.)com, your blog is on blog(.)yourcompany(.)com, and you have a separate landing page site or a microsite for a specific campaign. Each one is a domain HubSpot needs to know about. Go to Settings > Tracking & Analytics > Tracking Code and add your site domains. Without this, visits may register but won't show up in your traffic reports.
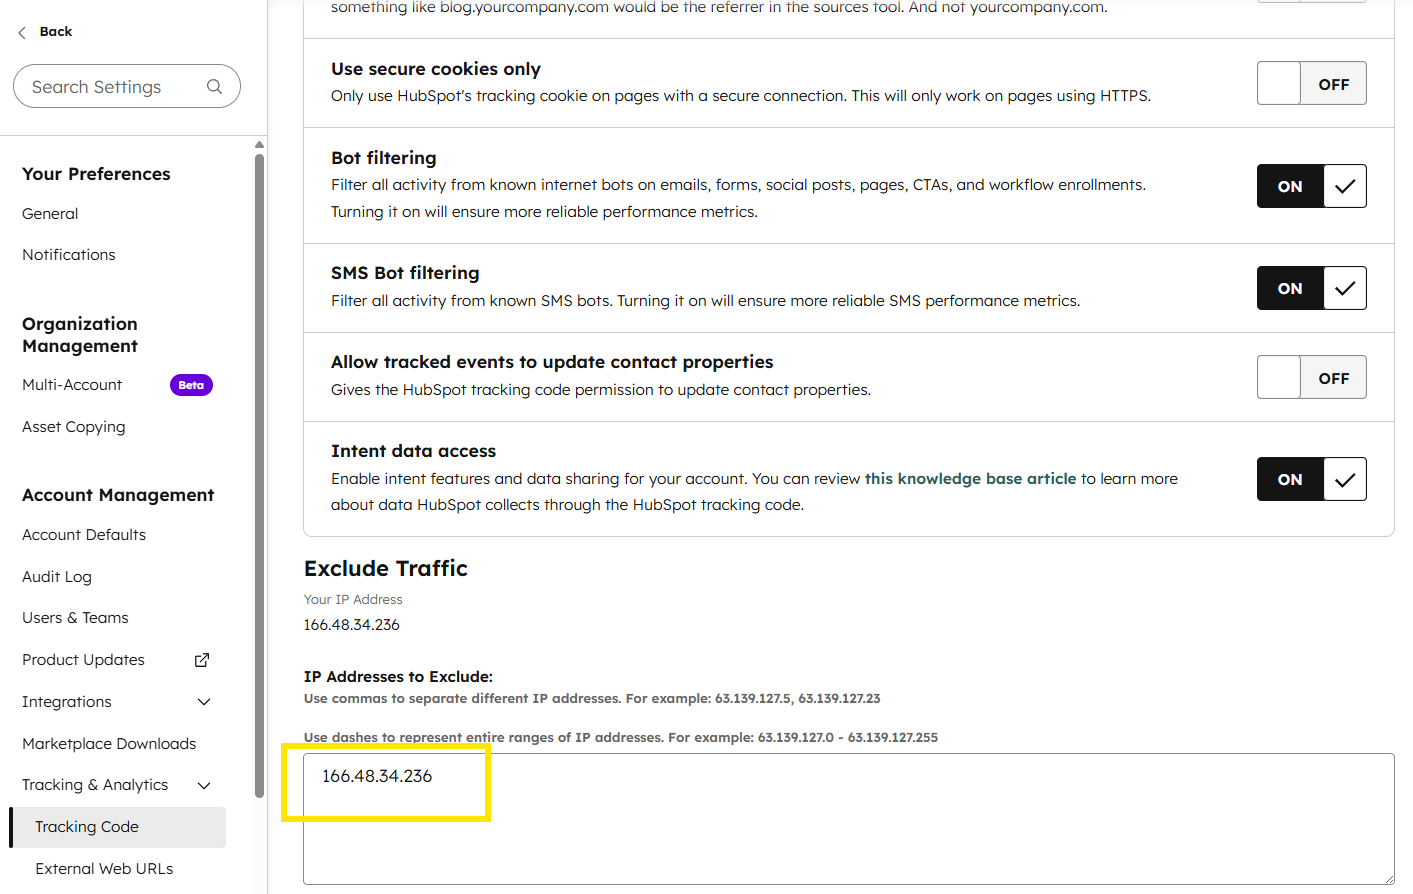
2. Filter out your own team's visits. By default, HubSpot counts everyone — including you and your team. If you don't exclude your office or home IP addresses, your traffic numbers will be inflated with internal visits. Set this up under Settings > Tracking & Analytics > Tracking Code > Advanced Tracking.
HubSpot Knowledge Base: Install the HubSpot Tracking Code →
2. Connect Google Search Console
(Requires a HubSpot Marketing Hub Subscription)
What is Google Search Console?
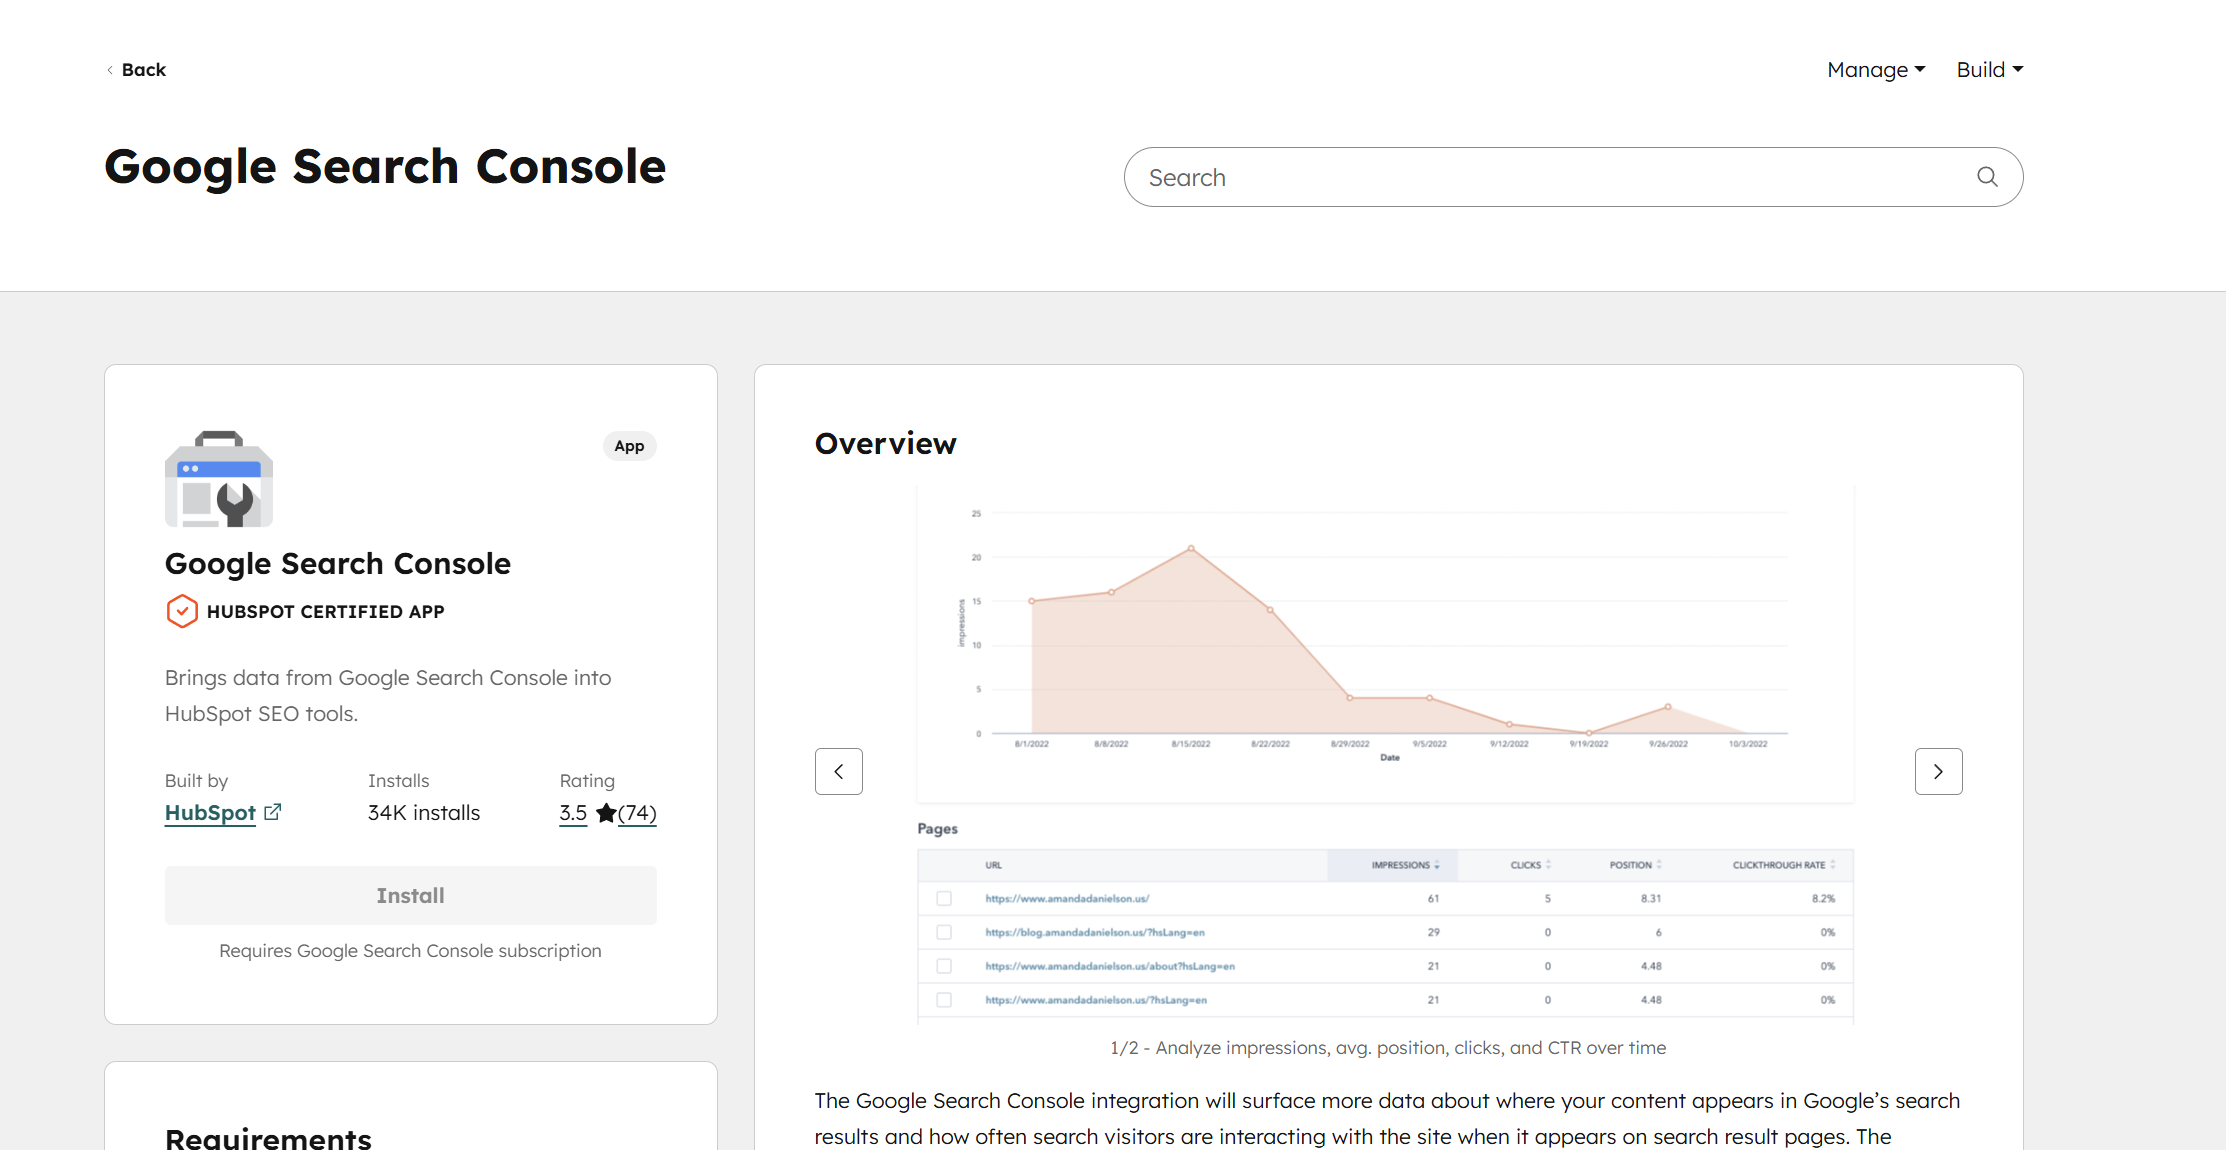
A free tool from Google that shows how your website performs in search results. It tells you what people search for when they find your site, how often your pages appear, and how many people click through. It's separate from Google Analytics — GA tells you what happens ON your site; GSC tells you how people FIND your site. HubSpot pulls GSC data into its own SEO tools so you can see everything in one place.
HubSpot has a full SEO dashboard built in. It can show you which search terms are bringing people to your site, how often your pages appear in Google results, how many people actually click through, and where your pages rank.
But here's the thing — that dashboard only works if Google Search Console is connected. Without it, the SEO section in HubSpot exists but has nothing to show you. It's like having a speedometer with no sensor attached.
SEO Analytics without Google Search Console Configured
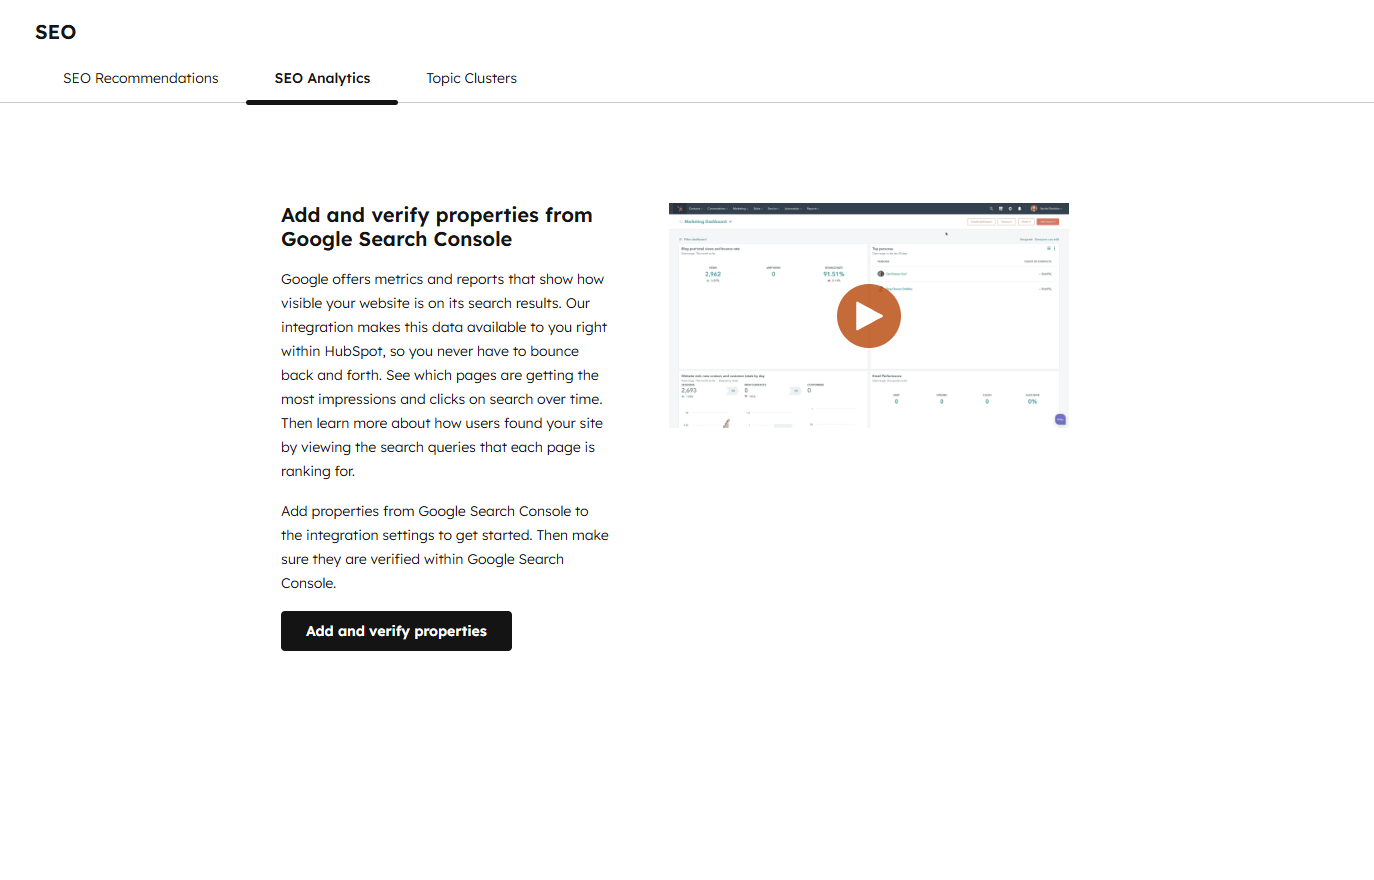
SEO Analytics with Google Search Console Configured
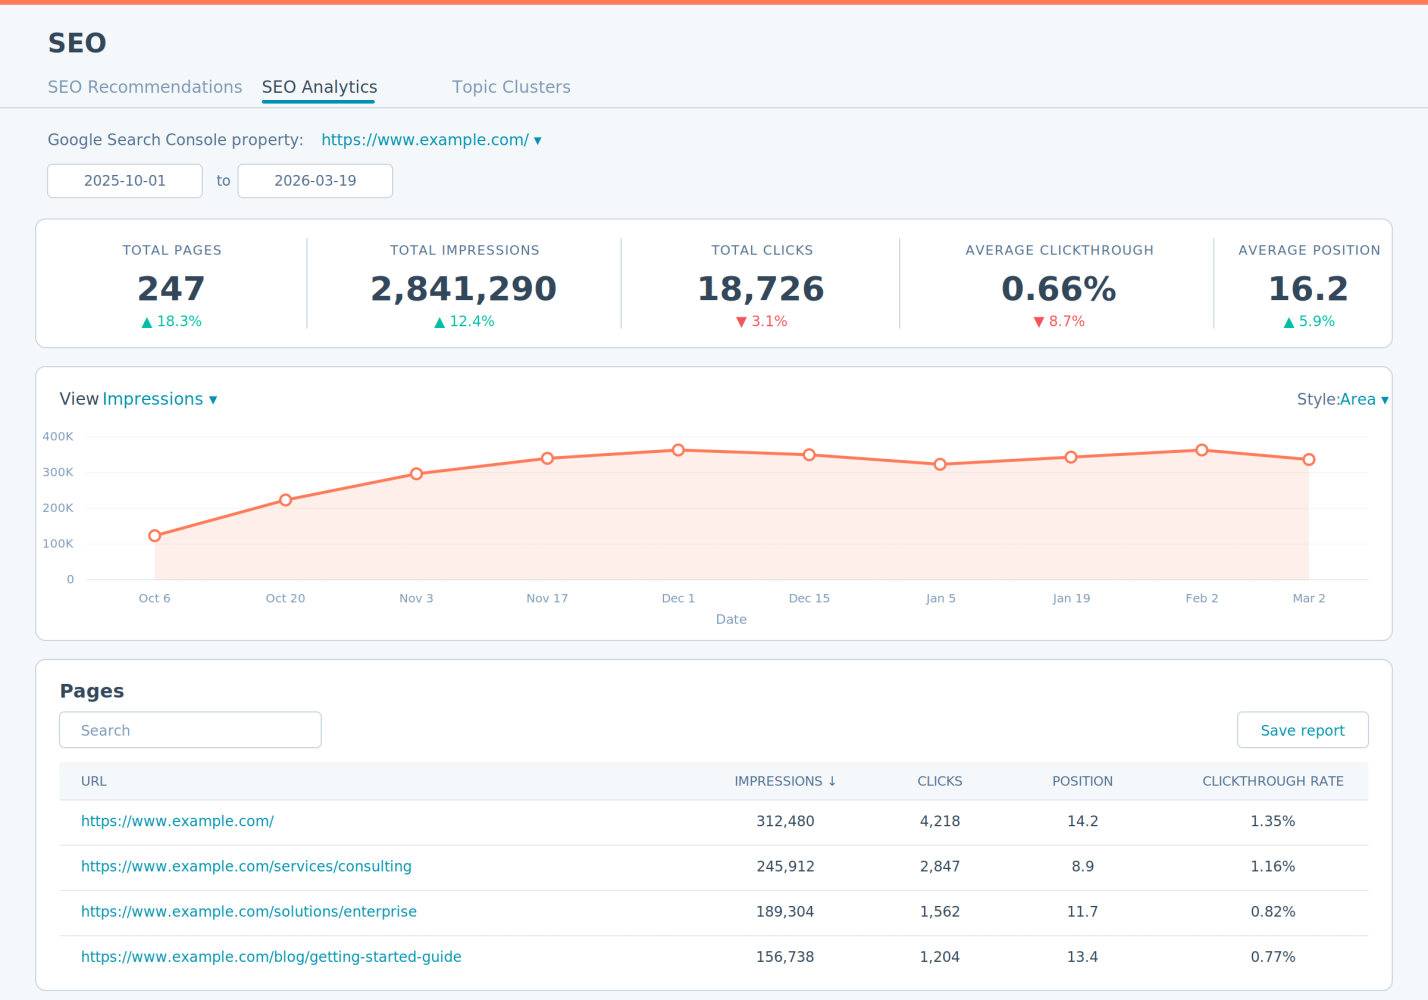
Once connected, you can answer questions like: Which search terms are people using to find my site? Which pages are showing up in Google — and where do they rank? Are the content changes I made last month actually improving visibility? Which pages get impressions but almost no clicks? (Those are your biggest SEO opportunities.)
Sample keywords that are leading users to a website: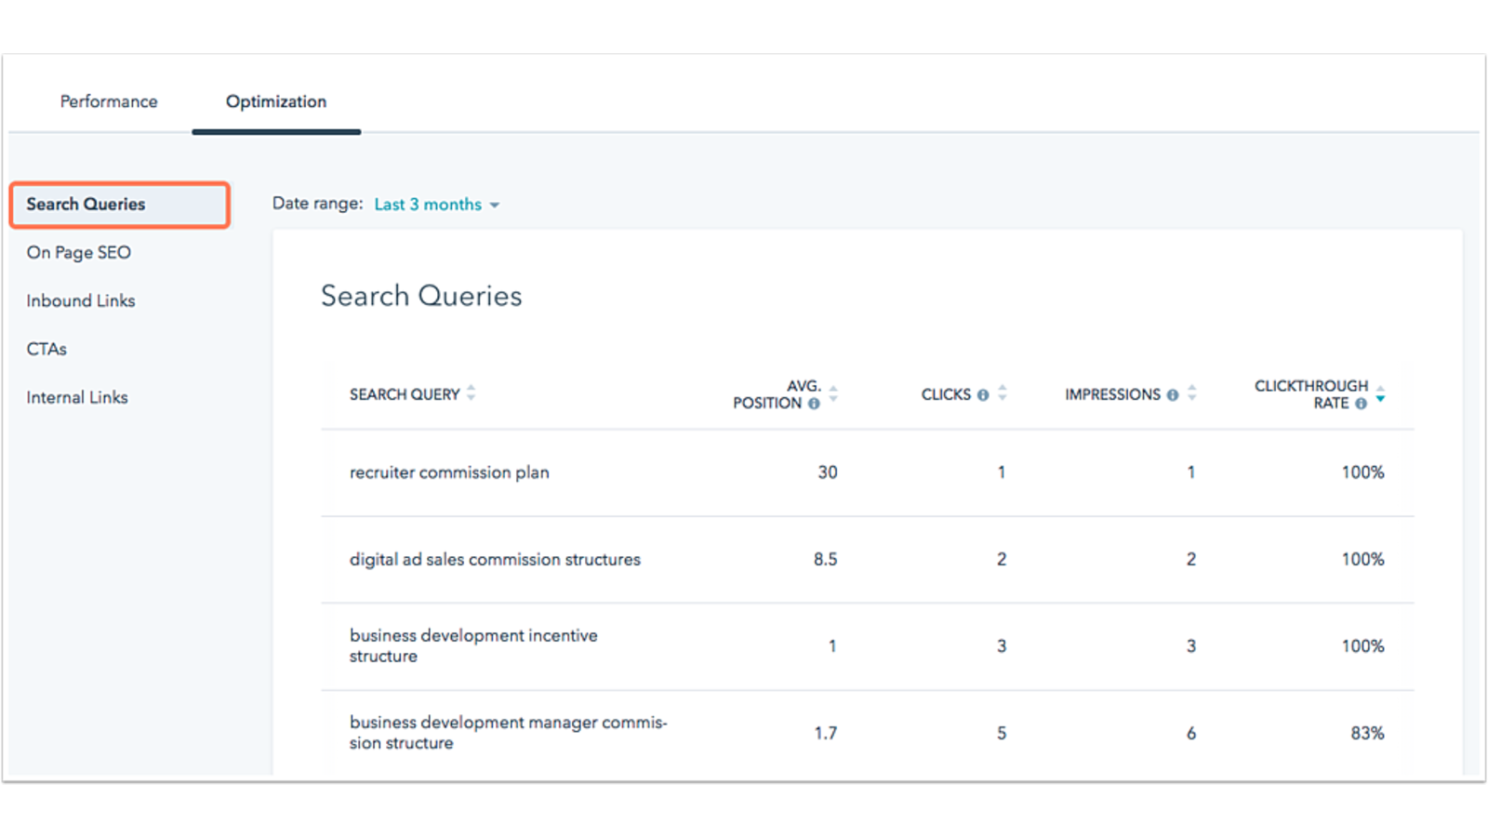
| 🪛 Setting it up: Step 1: Make sure you have a Google Search Console account and your website is verified in it. (If your site is hosted on HubSpot, it's already verified automatically.) Step 2: In HubSpot, go to the App Marketplace and search for "Google Search Console" (or click on the direct link below) Step 3: Click Install and sign in with your Google credentials Step 4: After connecting, go to Settings > Integrations > Connected Apps > Google Search Console and add any untracked domains |
Install the HubSpot Google Search Console App
Two things people miss:
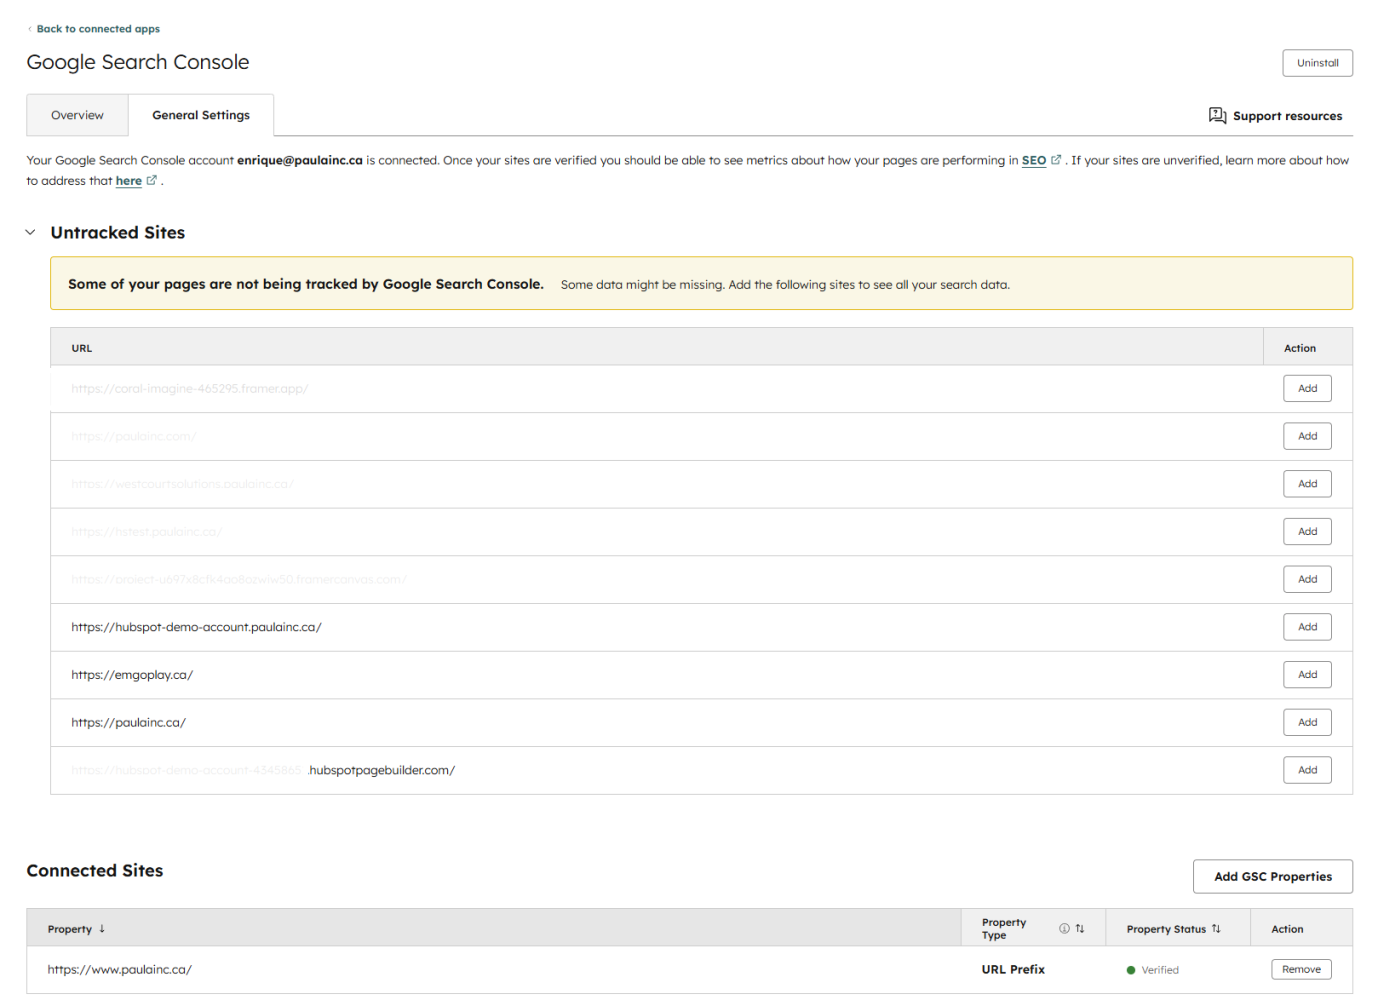
1. You need to manually add untracked sites after connecting. The integration doesn't automatically track all your domains. Go to Connected Apps > Google Search Console > General Settings and look for the "Untracked Sites" section. Click Add next to any domain you want data for — otherwise it won't appear in your reports.
2. If you disconnect, your data disappears after 90 days. HubSpot purges stored GSC data 90 days after disconnection. If you're troubleshooting and need to temporarily disconnect, reconnect promptly. This data isn't recoverable once it's gone.
HubSpot Knowledge Base: Enable the Google Search Console Integration →
3. Connect Individual Email Inboxes
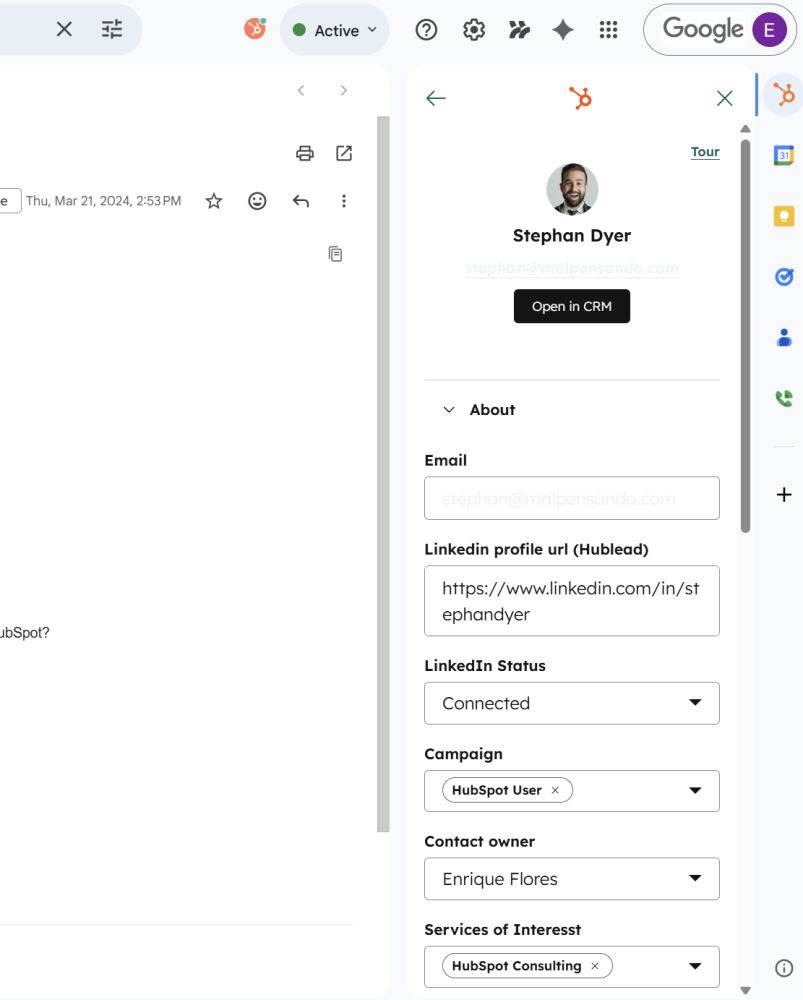
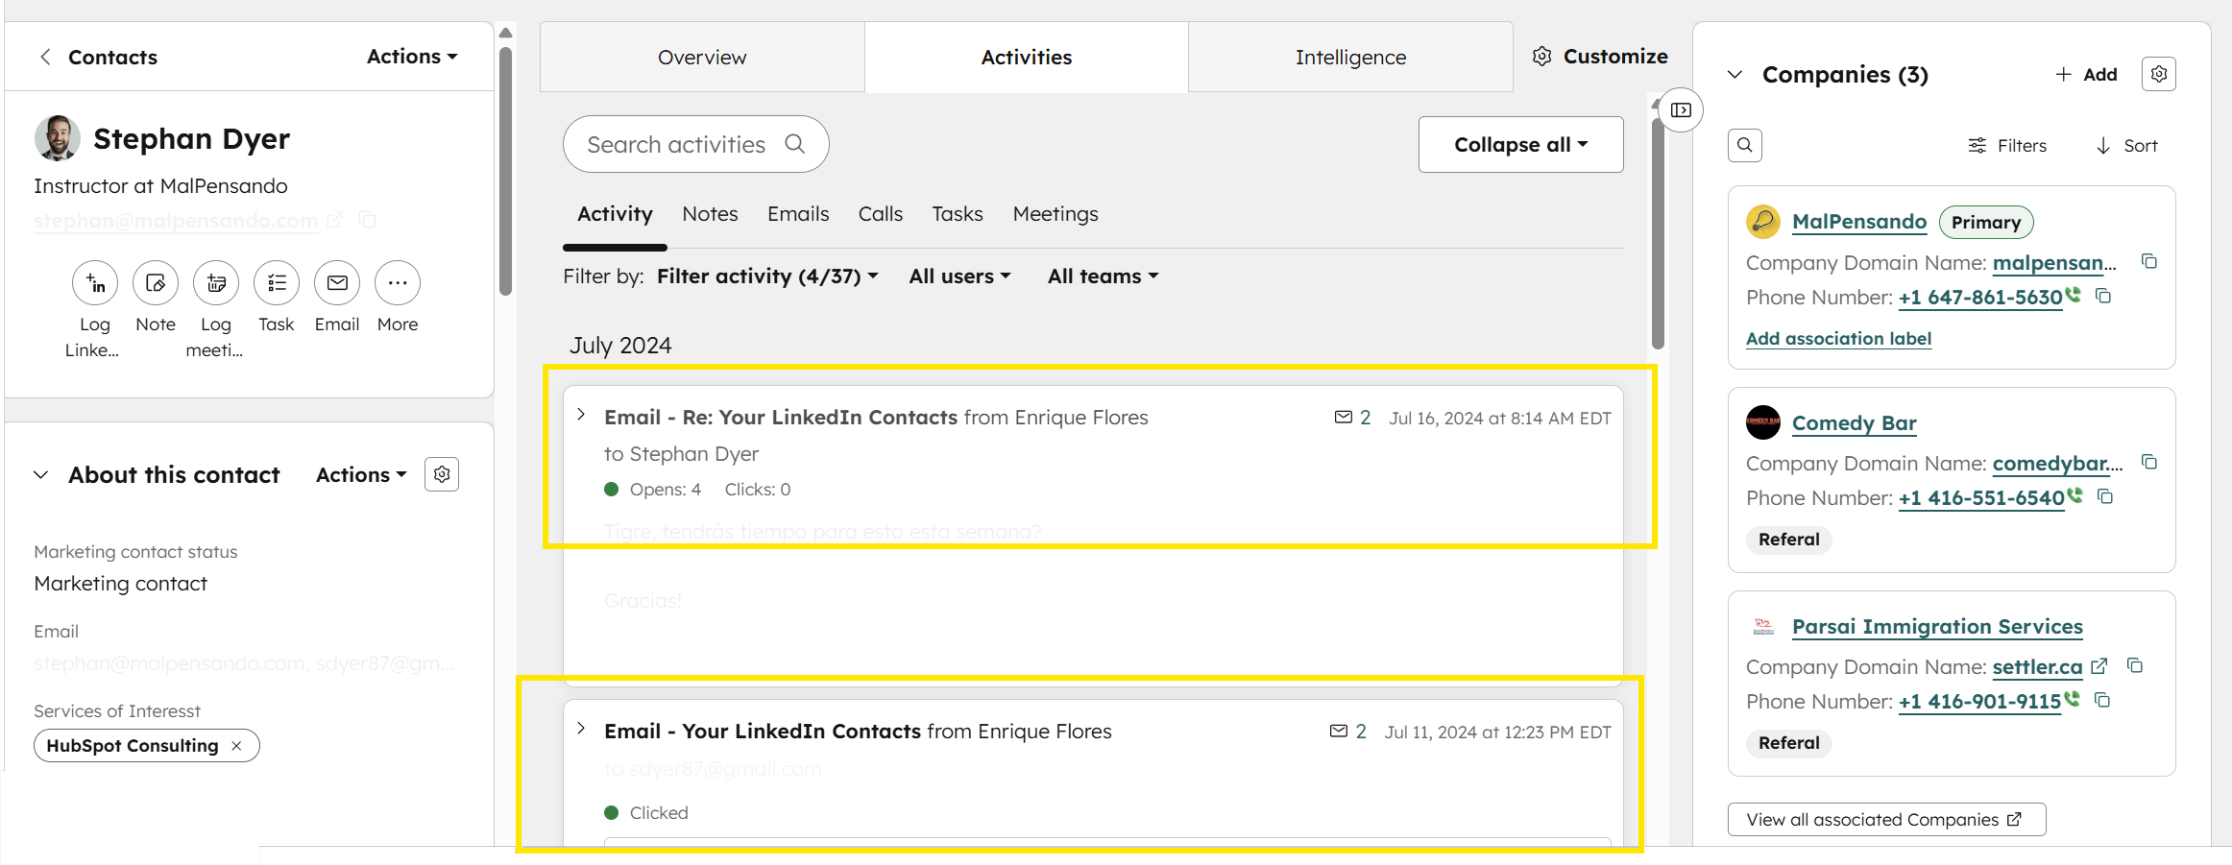
When a sales rep emails a prospect from Outlook or Gmail, that conversation should appear on the contact's record in HubSpot — automatically. The rep should be able to see whether the prospect opened the email.
Connecting individual inboxes is what makes all of that happen. Without it, the CRM has half the picture — and that's usually why teams say "the CRM isn't useful."
Just as importantly, many sales reps live in their inboxes, not in their CRM, so the ability to see CRM data right in Gmail or Outlook makes CRM adoption a lot easier.
Finally, managers should be able to see how much outreach the team is doing without asking everyone to self-report.
View from Gmail
View from HubSpot
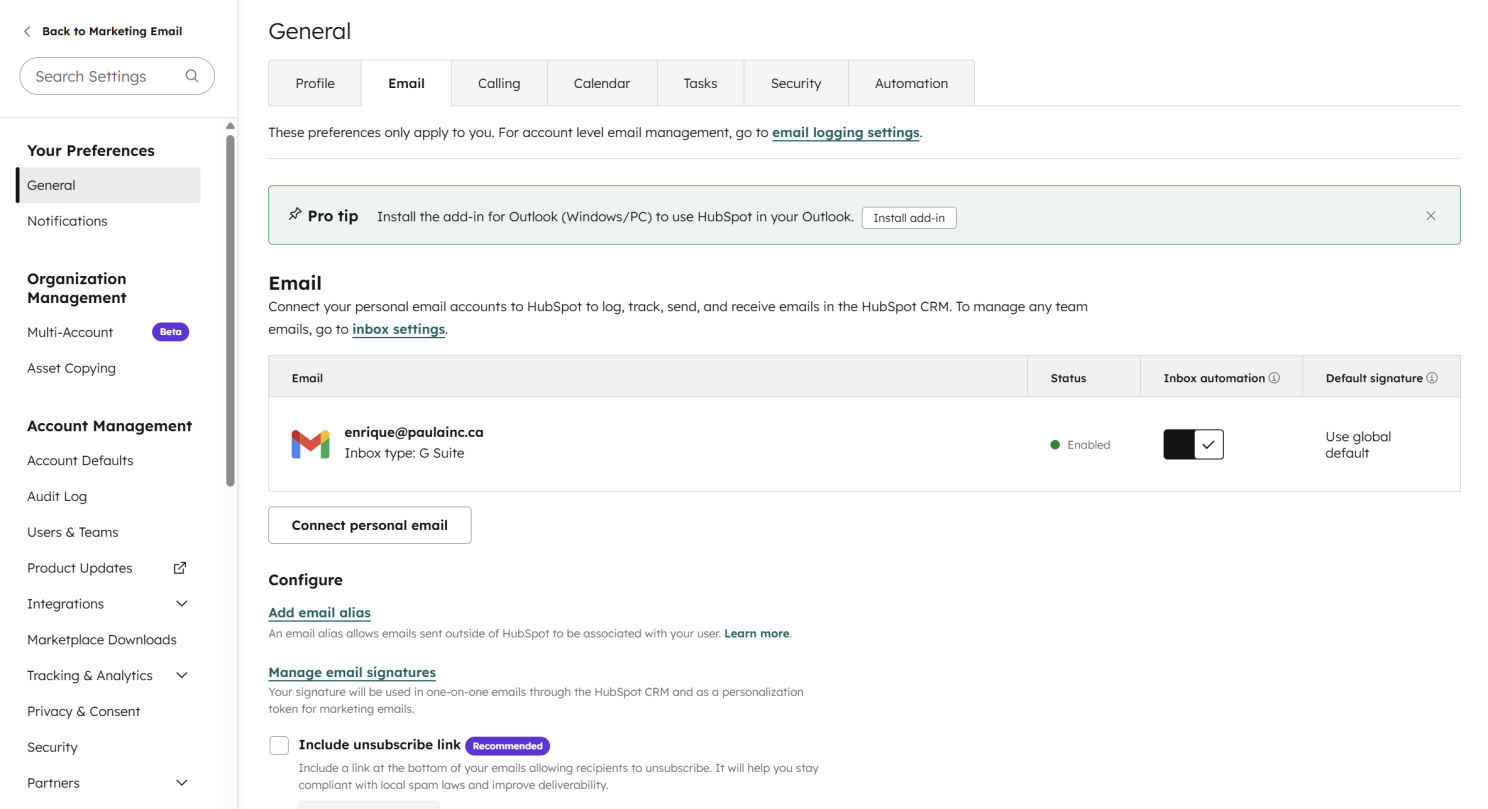
| 📖 HubSpot calls this "Personal Email" in the settings, which creates unnecessary confusion. It doesn't mean a personal email address — it means each team member's individual work email, as opposed to a shared mailbox like support@ or info@., which are managed by another HubSpot feature called Inbox. |
| 🪛 Setting it up: Step 1: Each team member goes to Settings > General > Email Step 2: Click "Connect personal email" Step 3: Select the email provider (Gmail, Outlook/Office 365, or IMAP) Step 4: Authenticate with email credentials Step 5: Check the "Turn on inbox automation" box (recommended — it uses AI to find contact details from incoming emails and suggest follow-up tasks) |
| 🚨 This can't be done by an admin on someone else's behalf. Each person needs to authenticate with their own email provider. There's no way to batch-connect inboxes from an admin panel. This is the number one reason it gets skipped — it requires individual action from every rep. Someone on the team needs to own driving this to completion. |
Two things people miss:
1. HubSpot doesn't read all your email. A common concern. Here's how it actually works: HubSpot monitors incoming mail for replies to emails that were sent from or logged to the CRM. It doesn't store the content of every email in the inbox. Email metadata is kept for up to 60 days. Body content from threads that aren't in the CRM is purged after 7 days.
2. You can connect multiple email addresses. If a team member uses more than one work email address — or has an alias — they can connect multiple inboxes to HubSpot. Gmail aliases are detected automatically. Outlook aliases need to be added manually under Profile & Preferences. This ensures emails sent from any of their addresses get logged.
HubSpot Knowledge Base: Connect Your Inbox to HubSpot →
Three settings — big impact.
And if you checked your portal while reading this and found any of these missing — you're not alone. It's a common pattern we see.
Now you know though, so go set this up and get true value out of HubSpot.